Edit person plugin
The content on this page was translated automatically.
Overview
1. create personal data record
Please make sure that you only edit the persons who belong to your area.
If a person's data record already exists, you can use it and add the function of your area!
Procedure: Select the list view (List module) and the "Persons" folder in the navigation bar. Now click on "+Create data record" in the content area.
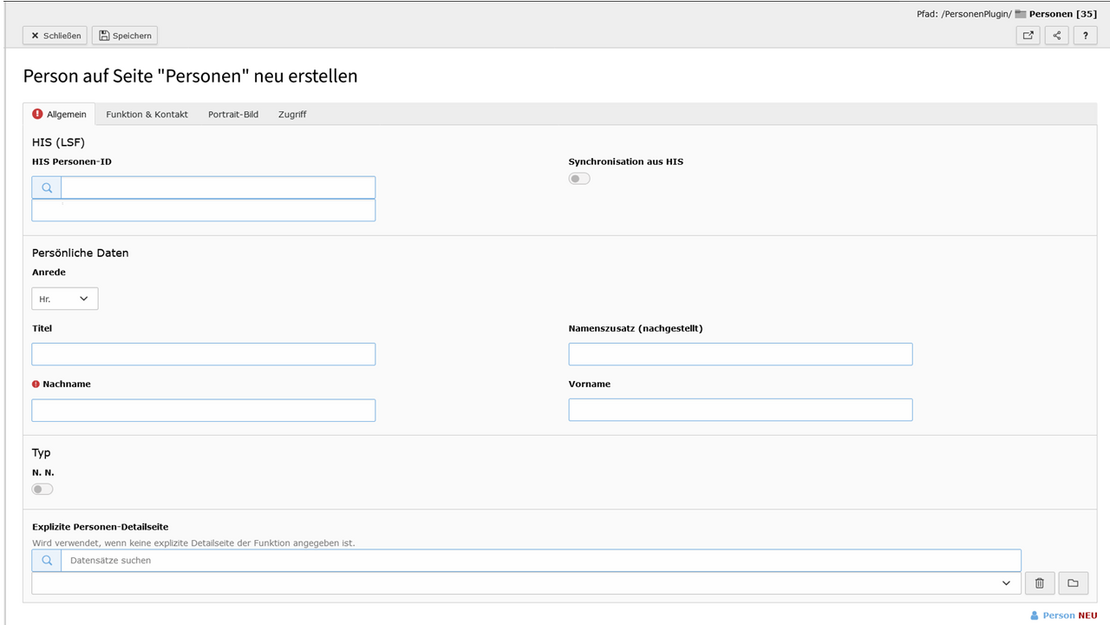
A new window opens in the content area: "Create new person on the "Persons" page". You have two options for creating a personal data record in the first tab "General":
1. manually:
Assign first name and surname + save
2.automatically by importing the HIS (LSF) ID:
Enter "HIS person ID" and activate + save synchronization
After saving, the name is visible in the field, but cannot be overwritten.
The existing address data from the HIS LSF is stored as import data in the "Contacts" field (Function & Contact tab).
Prerequisite for importing the HIS (LSF) ID
External visibility in HIS
For the import into Typo3 from HIS to work, the person in HIS must be released for external reading. To do this, send an e-mail with the request to
ttslsf[at]uni-kassel[dot]de
If a person is not enabled for external reading in HIS, this person's data cannot be found and imported in the Typo3 backend (person plugin).
2. add function
A person can have several functions (and possibly also different contact data). The assignment to the organizational unit is then made via the person's "Function".
Select the second tab in the person data record "Function & contact" and click on "+Create new".
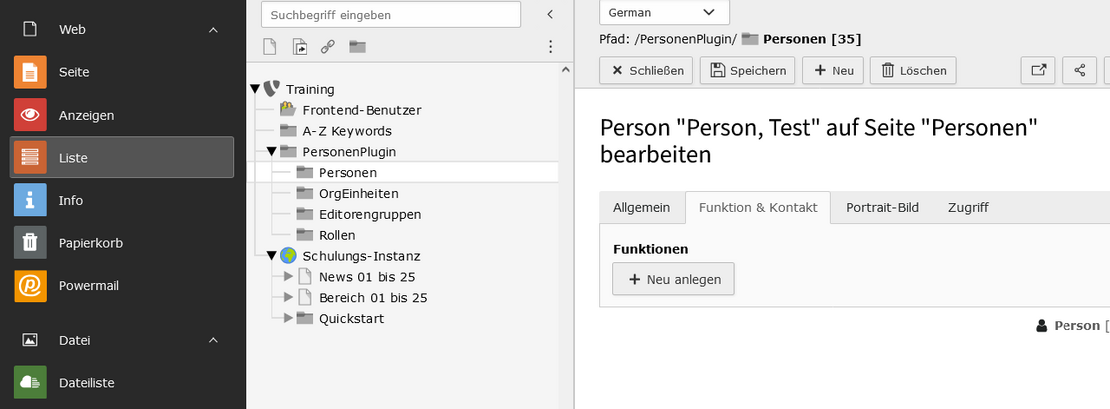
- Then enter the function title.
- Optionally, you can select a role. The assignment of a role enables filtering according to certain criteria in the list view. Roles are created and managed centrally by the respective Typo admins of the web instances.
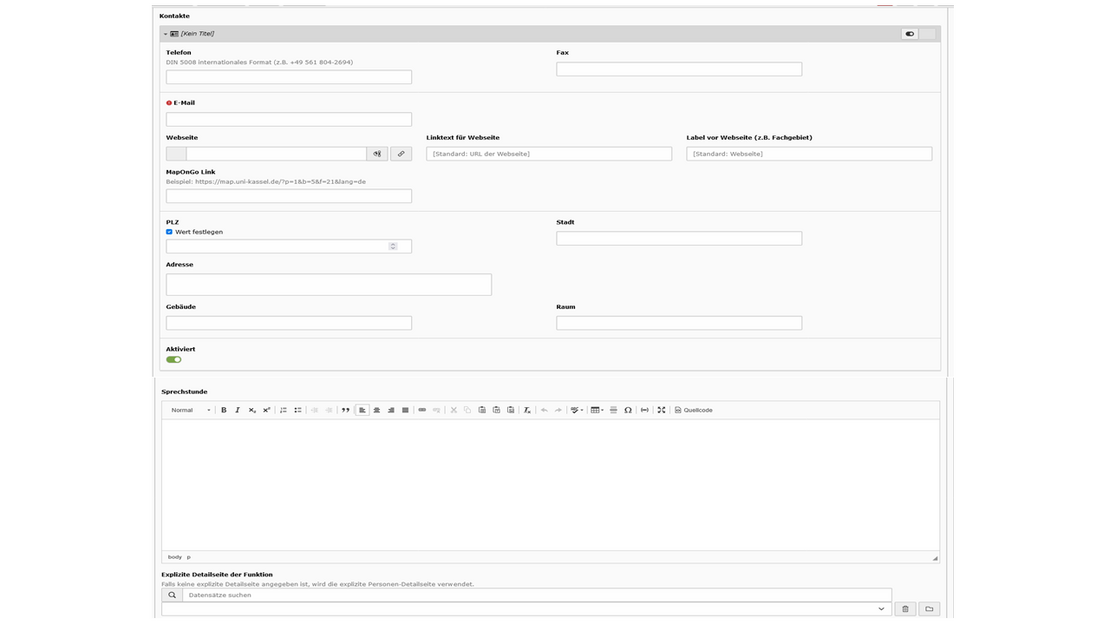
The following fields can be edited in the General tab: Contact data: Phone, e-mail, address, room, building etc. as well as free field Consultation hours
Here it is possible to select the field "with import contact"- The following content elements can be filled out in the Details tab: CV, projects, publications via snippet, area of responsibility, further description,
- Substitute: Existing persons can be selected as substitutes (4th tab).
- You control access, i.e. the visibility of the function, in the 5th tab.
Then save and, if necessary, create another function (+ contact).
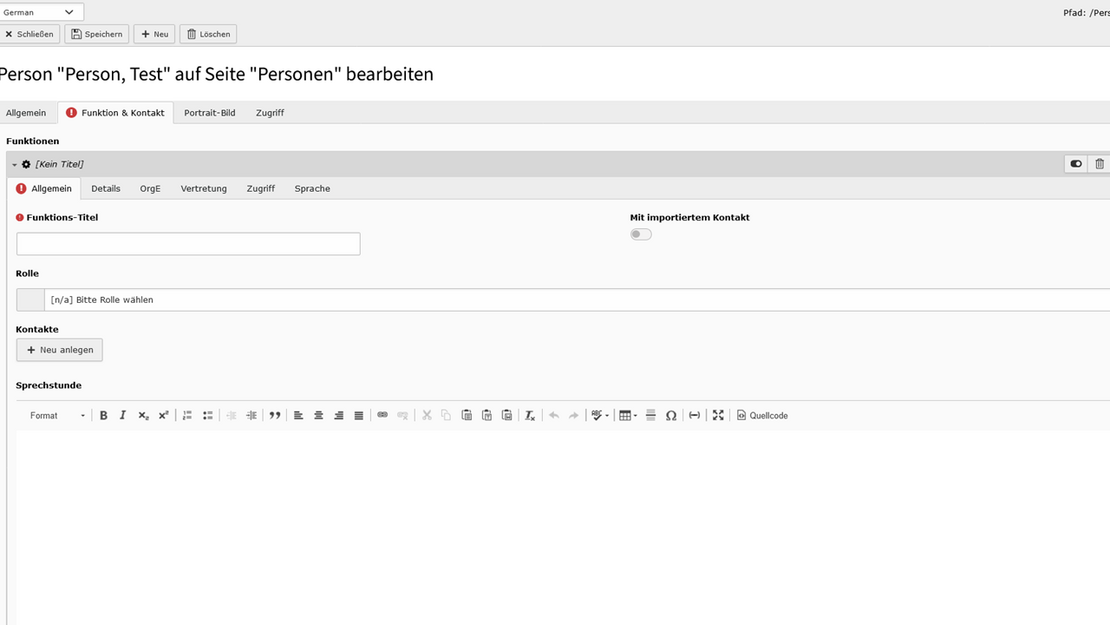
Add contact details
In the created function, there is a selectable field "Create contact"
You can expand an imported contact with the down arrow. Or without import: you create a new contact.
- Imported data from HIS LSF cannot be overwritten, but empty fields can be filled in.
- If the person has been imported via HIS-ID, the fields that have also been entered in the HIS LSF are already filled in. If these are not complete or not up to date, find out in your departments (dean's offices/secretariats) who enters the contact details and pass on your requirements.
- Please note the DIN 5008 international format for the telephone number: e.g. +49 561 804-2694. Other values will not be accepted.
Then fill in all the required data and save. You can activate or deactivate the contact.
Add personal photo
Add a portrait photo via the 3rd tab "Portrait image".
Click on "Add image" and then select and insert the previously uploaded photo via the file browser.

Tips for using photos
Recommendation: 16:9 format with a resolution of 1280 pixels or more, preferably in file format: JPEG or PNG
File list/photo folder: Select photo and go to edit mode (pencil icon): 2. tab: Metadata: Enter author:in in the "Copyright" field
Author:in appears in the frontend at the top right of the image
If no photo is available, employees can have a photo taken at the cost center.
3. assign person to an organizational unit
Procedure
Once you have created the persons to be displayed with their functions, the organizational units are created, possibly with substructures. Persons are then placed in the organizational units using their function.
An organizational unit can then be read and evaluated in the list plugin on the website.
These org units are therefore the basis for the list view of the person plugin. It can read out an org unit and display the persons in the order specified there and or all the org units below it.
However, if this "recursive" readout is configured, the plugin can no longer offer sorting by org unit and then hides this option and the default sorting is applied, by role and name.
Organizational units contain groups of people that can be read out on a page as a list data record via the plugin. Organizational units can be created independently by Typo3 editors within the scope of their assigned rights (defined in the editor groups).
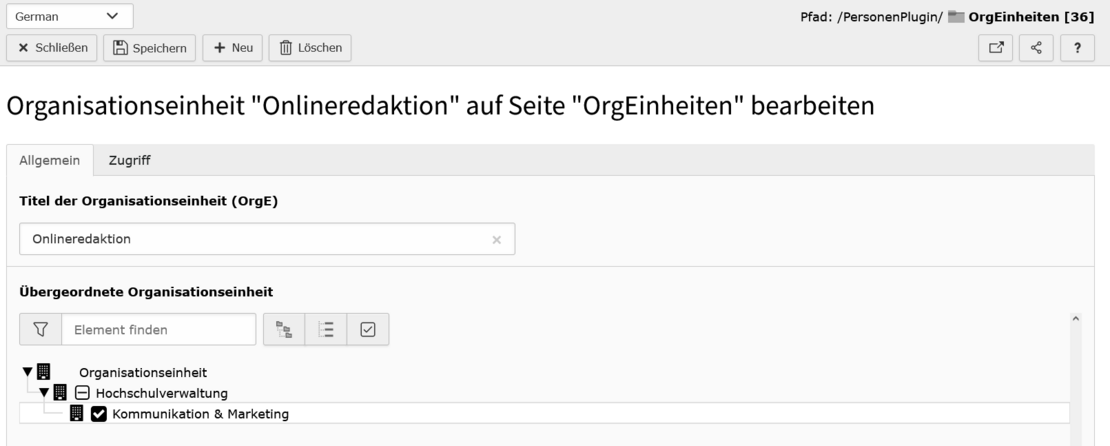
The OrgUnit data record requires 3 entries:
- Title of the organizational unit (OrgE)
- Superordinate organizational unit
- Assigned persons (via function)
You can use +Create data record to create an organizational unit, which in turn requires a parent category (superordinate organizational unit), e.g.
- University administration
- K&M
- Online editorial office
- K&M
Organizational units are recursive / cascading. In the backend, these created units are not displayed in hierarchical order; you only see the structured OrgUnit tree in the plugin selection.
If you have to create many units, it makes sense to add the"root" in front of the name of the unit!
In this example, 5 levels: FBXX-Institute-Institutefor Typo3-Subject areaExample-Scientific employees
Example: Later, a list of all "scientific employees" is to be displayed on the pages of the subject area.
| Level | OrgUnit (branch) | OrgUnit Name (root branch) |
|---|---|---|
| 1 | FBXX | FBXX |
| 2 | Institutes | FBXX Institutes |
| 3 | InstituteXX | Institute-InstituteXX |
| 4 | Subject areaXX | InstituteXX-SpecialtyXX |
| 5 | Scientific staff | DepartmentXX-Scientific staff |
This is currently being revised.
Output views on websites
Status: November 24
This is currently being revised.


