OpenStreetMap
The OpenStreetMap web service falls under an "Open Data" license published by the OpenStreetMap Foundation (OSMF) in accordance with the Open Data Commons Open Database License (ODbL).
This means that OpenStreetMap data can be used without restriction as long as reference is made to OpenStreetMap. This is a significant advantage compared to the use of Google Maps services, for example, where various obligations arise, such as the integration of the Google API on your own website.
In our application scenario as an HTML snippet in the Typo3 CMD of the university websites, no reference to OpenStreetMap is required, as the snippet automatically carries the necessary markers.
However, the decisive unique selling point is added to the pure map service "OpenStreetMap" by the "uMap Map Editor". This allows the map views to be edited and individual markers to be added. The uMap map editor is open source (free software) and falls under a WTFPL license (quote from the official wiki page: Do What The Fuck You Want To Public License) - freely translated: Do What The Fuck You Want To Public License.
Step-by-step
As already explained, both OpenStreetMap and uMap are free software. However, a user account is required to manage the settings, share links and individual maps. To register, please proceed as follows:
Open OpenStreetMap.org and click on "Register" in the top right-hand corner. An e-mail, a display name and a password are all you need to enter.
Step 1: Go to the website https://umap.openstreetmap.de.
Step 2: Log in via the menu item "Login / Log in" at the top left. After clicking on the menu item on the right-hand side, a new window will appear in which you must click on the OpenStreetMap logo again.
Step 3: During the login process, uMap is now granted access to the previously registered OpenStreetMap user account. You can allow this by clicking the "Grant access" button.
Step 4: After successfully logging in, you will be redirected to the main page and can now get started using the "Create a map" button.
Step 5: Your first action should now be to name your card. To do this, click on "Unnamed card" at the top left and then make the initial settings for your card in the right-hand side menu.
Step 6: Use the blue "Save" button in the top-right corner to save your individual map.
Note: Your map is publicly visible by default after creation, if you do not want this, you must perform a few more steps after the first "Save" of your map:
- Reload the page by refreshing the browser window - press the F5 key
- Click on the pencil icon in the top-right corner to activate the edit mode
- Navigate to the "Change permissions and editors" property - the key symbol in the editing bar
- Set the "Who can view" parameter to "Anyone with a link"
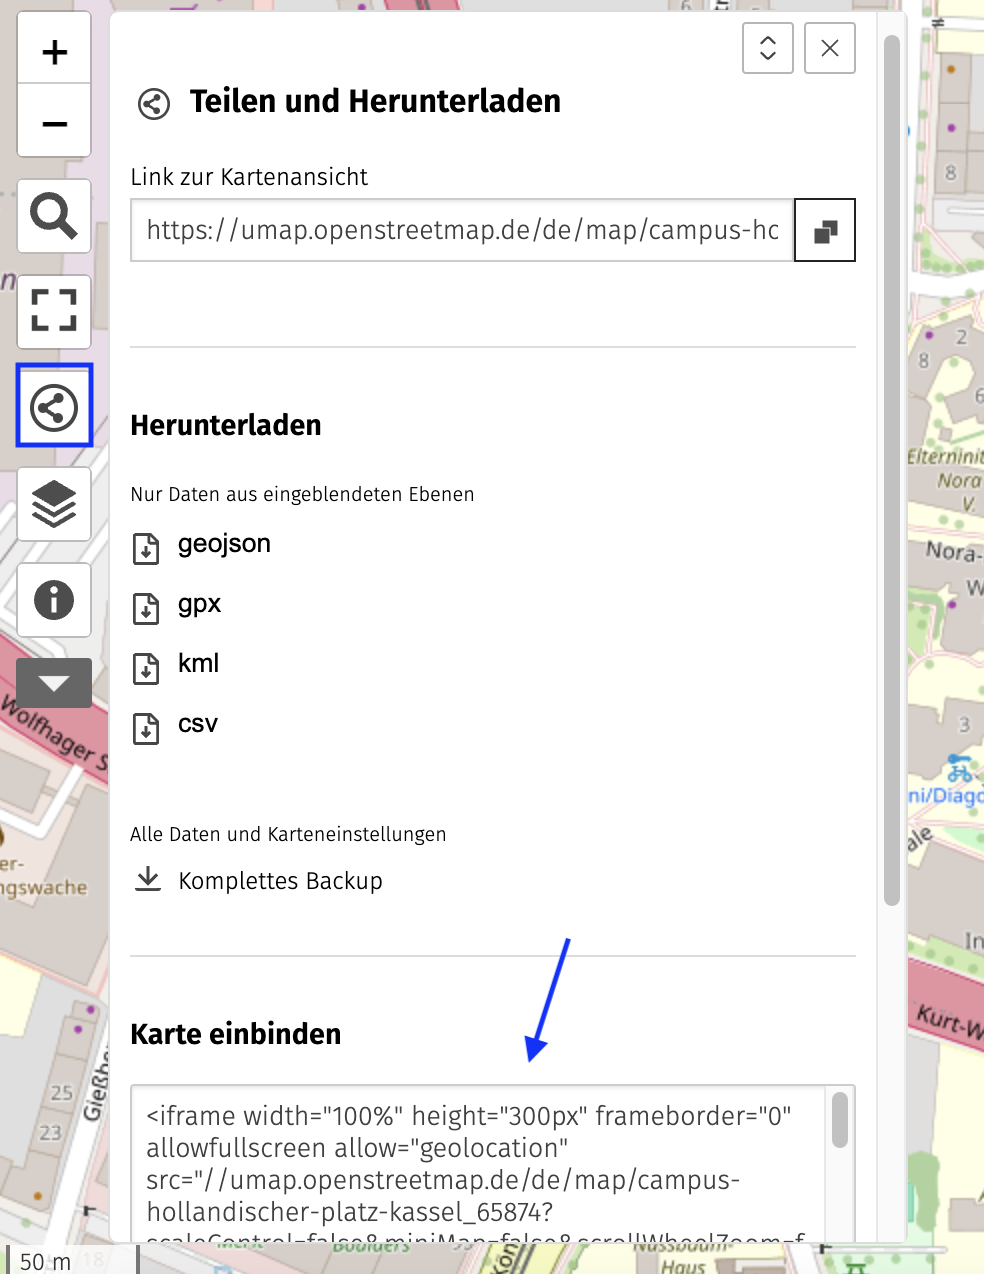
In this section you will learn how to use the map you have created on the university's website. If you select the "Share" icon in the left-hand navigation bar (highlighted in the image below), an HTML code snippet will be displayed in a new menu.
Example:
<iframe width="100%" height="300px" frameborder="0" allowfullscreen src="//umap.openstreetmap.de/en/map/uni-kassel-eecs_10286?scaleControl=false&miniMap=false&scrollWheelZoom=false&zoomControl=true&allowEdit=false&moreControl=true&searchControl=null&tilelayersControl=null&embedControl=null&datalayersControl=true&onLoadPanel=1&captionBar=false"></iframe>
The so-called iframe can be integrated as an HTML content element by persons with special authorization. If you do not have such authorization, please contact your Typo3 admin.
You can also edit the properties of the content element via the individual parameters in the iframe:
- height="300px" - here you can change the height of the content element in pixels
- zoomControl=true - with the parameter "true" or "false" you can activate or deactivate the zooming of the maps

Click on the pencil icon in the top right-hand corner to activate edit mode. In the editing menu, select the menu item "Change authorizations and editors" (the key symbol). As the card owner, you have various options in this menu:
1. who can edit?
- Only editors can edit (Only people listed under the card editor and the owner can make changes)
- Only the creator can edit (Only the map owner can make changes to the map)
- Anyone can edit [Not recommended] (Anyone can edit the map)
2. who can view?
- Anyone (public) (The map is publicly visible on the start page (https://uMap.OpenStreetMap.de))
- Anyone with a link (Anyone who has a link to the specified map may view it) - this is the appropriate setting for integration as an iframe
- Only editors (Only registered editors may view the map)
Map owner: as the owner, you can transfer ownership of a map to other valid OpenStreetMap accounts (ATTENTION: this action cannot be undone).
Map editor: as an editor, you can add other OpenStreetMap accounts as editors and make changes to the map.

